| 단 | ||||||||||||||
|---|---|---|---|---|---|---|---|---|---|---|---|---|---|---|
| ||||||||||||||
|
I.Windows Service
Bitbucket Memory 설정
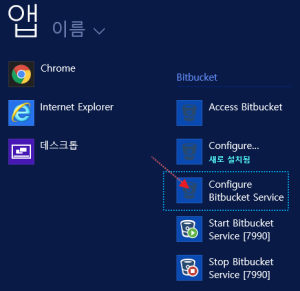
1.윈도우 메뉴에서 "Windows Start Menu" 클릭

2.시작메뉴에서 앱 확장 기능 클릭
- 이미지 하단 아이콘 클릭

3.Bitbucket 메뉴에서 “Configure Bitbucket Service” 클릭
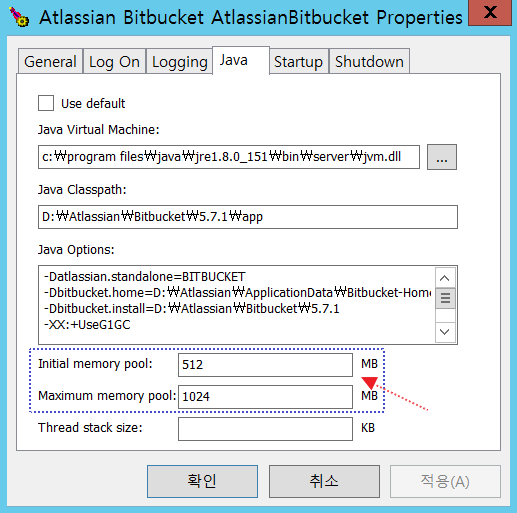
4.Properties 팝업화면에서 JAVA탭 확인
- Initial memory pool 과 Maximum memory pool 사이즈 설정
- 서비스 시작
II.Linux
Bitbucket Memory 설정
1.Bitbucket 설치 폴더의 bin 폴더에서 “_start-webapp.sh” 파일 설정 변경
- Ex: bitbucket-5.7.1/bin/_start-webapp.sh
| 코드 블럭 |
|---|
# The following 2 settings control the
minimum and maximum memory allocated to the Java virtual machine.

# For larger instances, the maximum
amount will need to be increased.
#
if [ -z "${JVM_MINIMUM_MEMORY}" ]; then
JVM_MINIMUM_MEMORY=512m
fi
if [ -z "${JVM_MAXIMUM_MEMORY}" ]; then
JVM_MAXIMUM_MEMORY=1g |
2.서비스 재시작
이 문서는 Bitbucket의 Memory 증설을 위한 가이드를 제공 한다.
| 목차 |
|---|
설치 환경
OS : Windows Server 2012 R2 Datacenter 64bit
OS : CentOS 7 64bit
Bitbucket : 4.14.4
Windows
Bitbucket Memory 설정
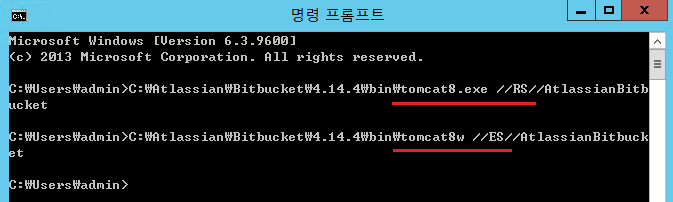
Bitbucket Memory 설정하기 위해 서비스를 중지하고 실행 파일 경로를 복사한다.

cmd 실행 하여 tomcat8.exe //RS 를 tomcat8w //ES 으로 변경하여 실행한다.
JAVA 탭으로 이동하여 Initial memory pool, Maximum memory pool 사이즈를 늘려주고 서비스를 시작한다.

Linux
Bitbucket Memory 설정
Bitbucket의 <Install_directory>/bin/setenv.sh 파일을 아래 그림과 같이 수정 후 서비스를 재시작 한다.
- JVM_MINIMUM_MEMORY="1024m"
- JVM_MAXIMUM_MEMORY="1024m"
